Everything looks more adorable and happy with a smile! The best part is, it’s super easy. When I add smiles, I prefer to add them when I add the safety eyes, before the piece is stuffed and finished but you can add it when the piece is finished if you’d like. You just won’t add the square knot at the end.
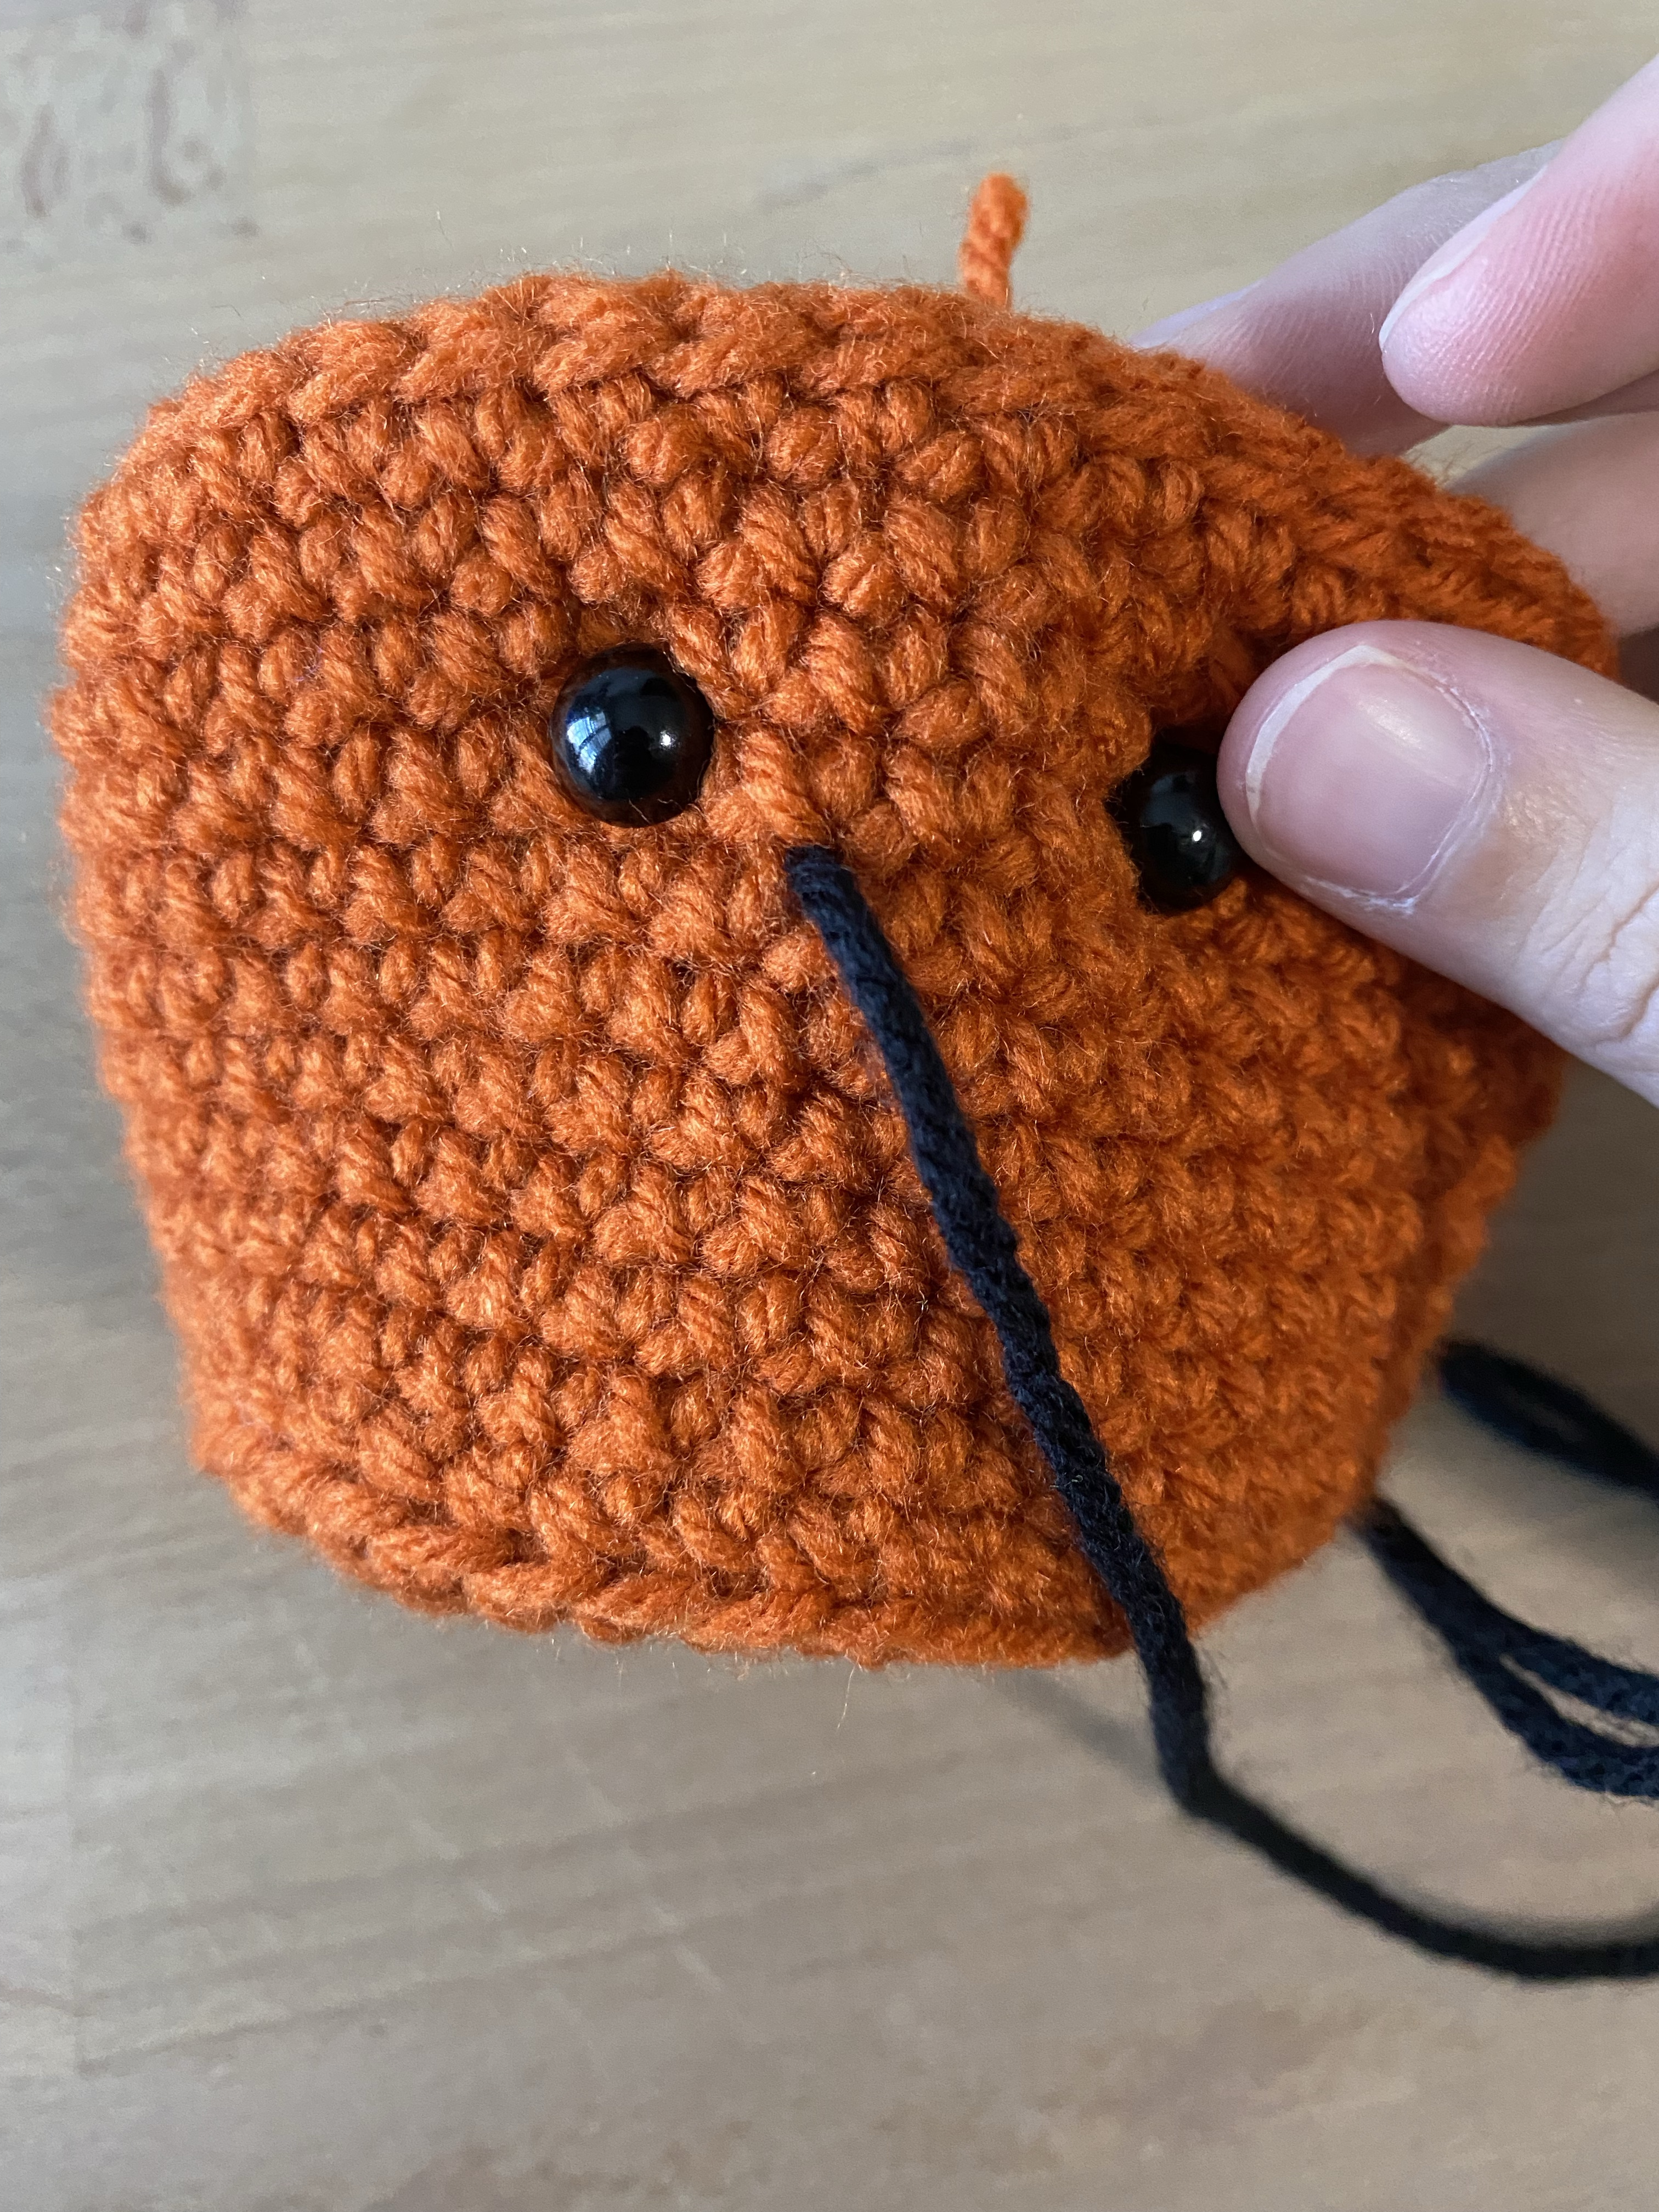
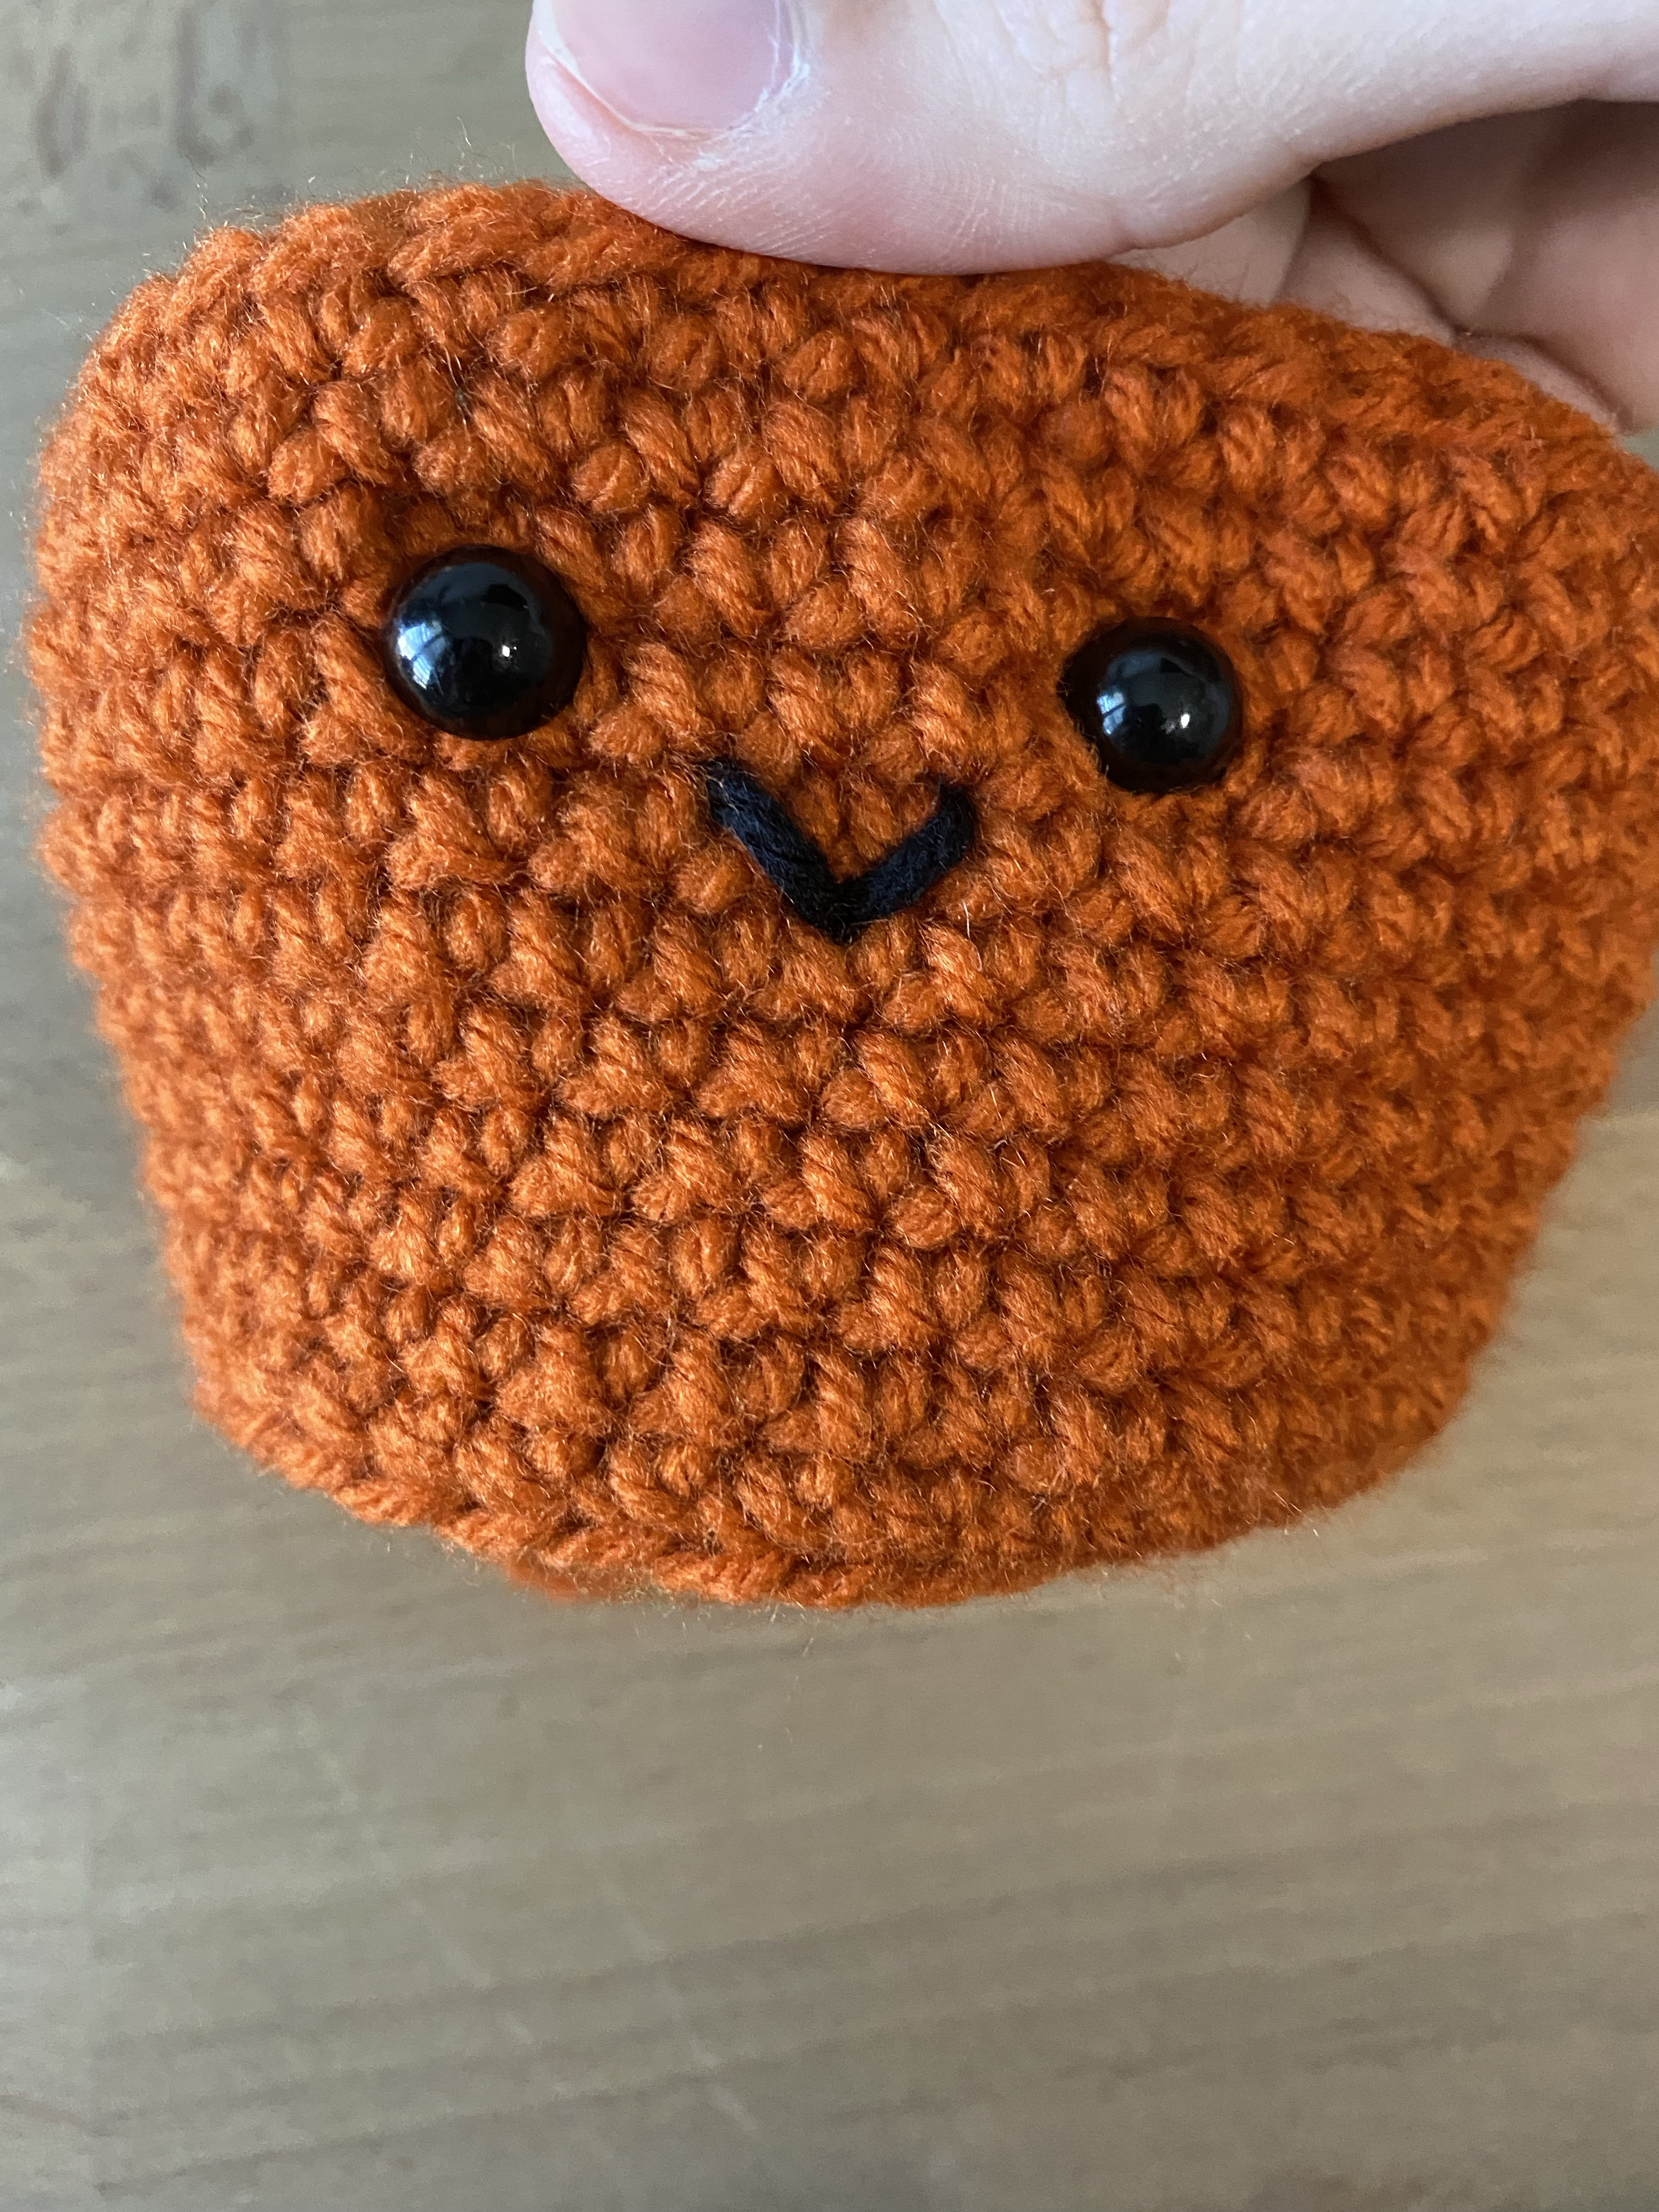
Start by placing your black yarn (or black embroidery thread) on the tapestry needle. Starting from the back, poke through where you want one side of the mouth to be. When you pull through, make sure there are a few inches of tail in the back so it doesn’t slip out.
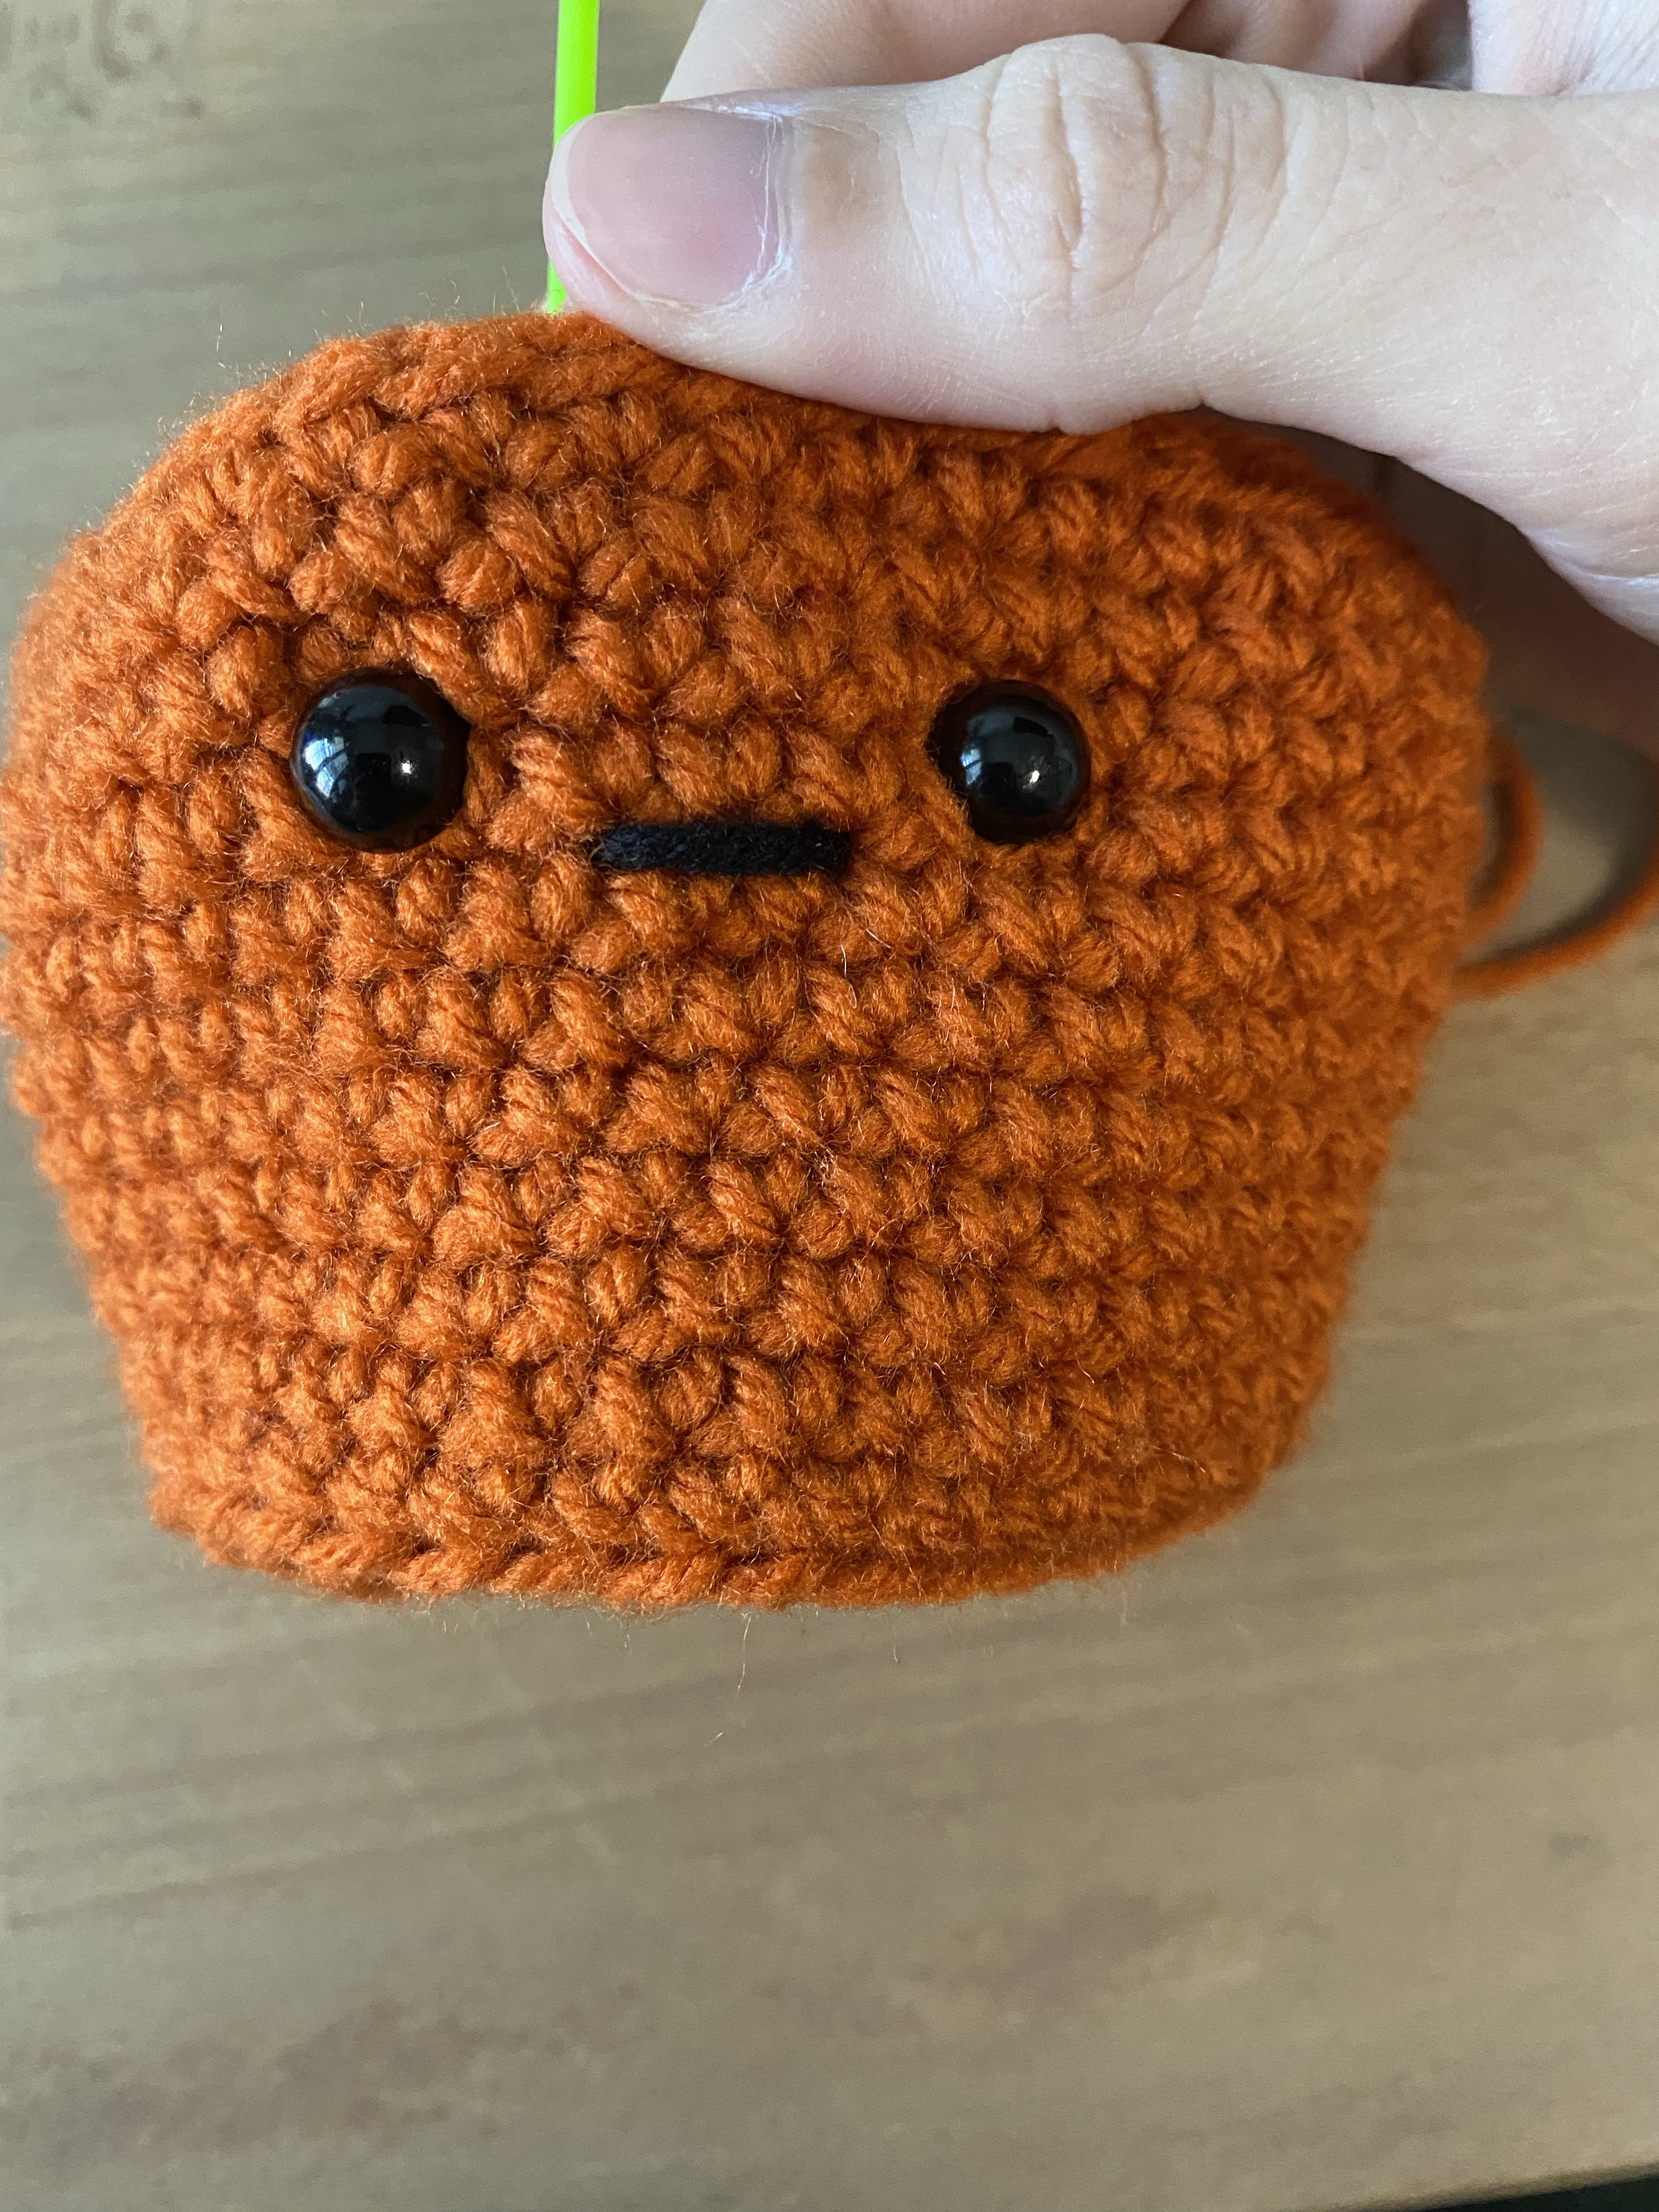
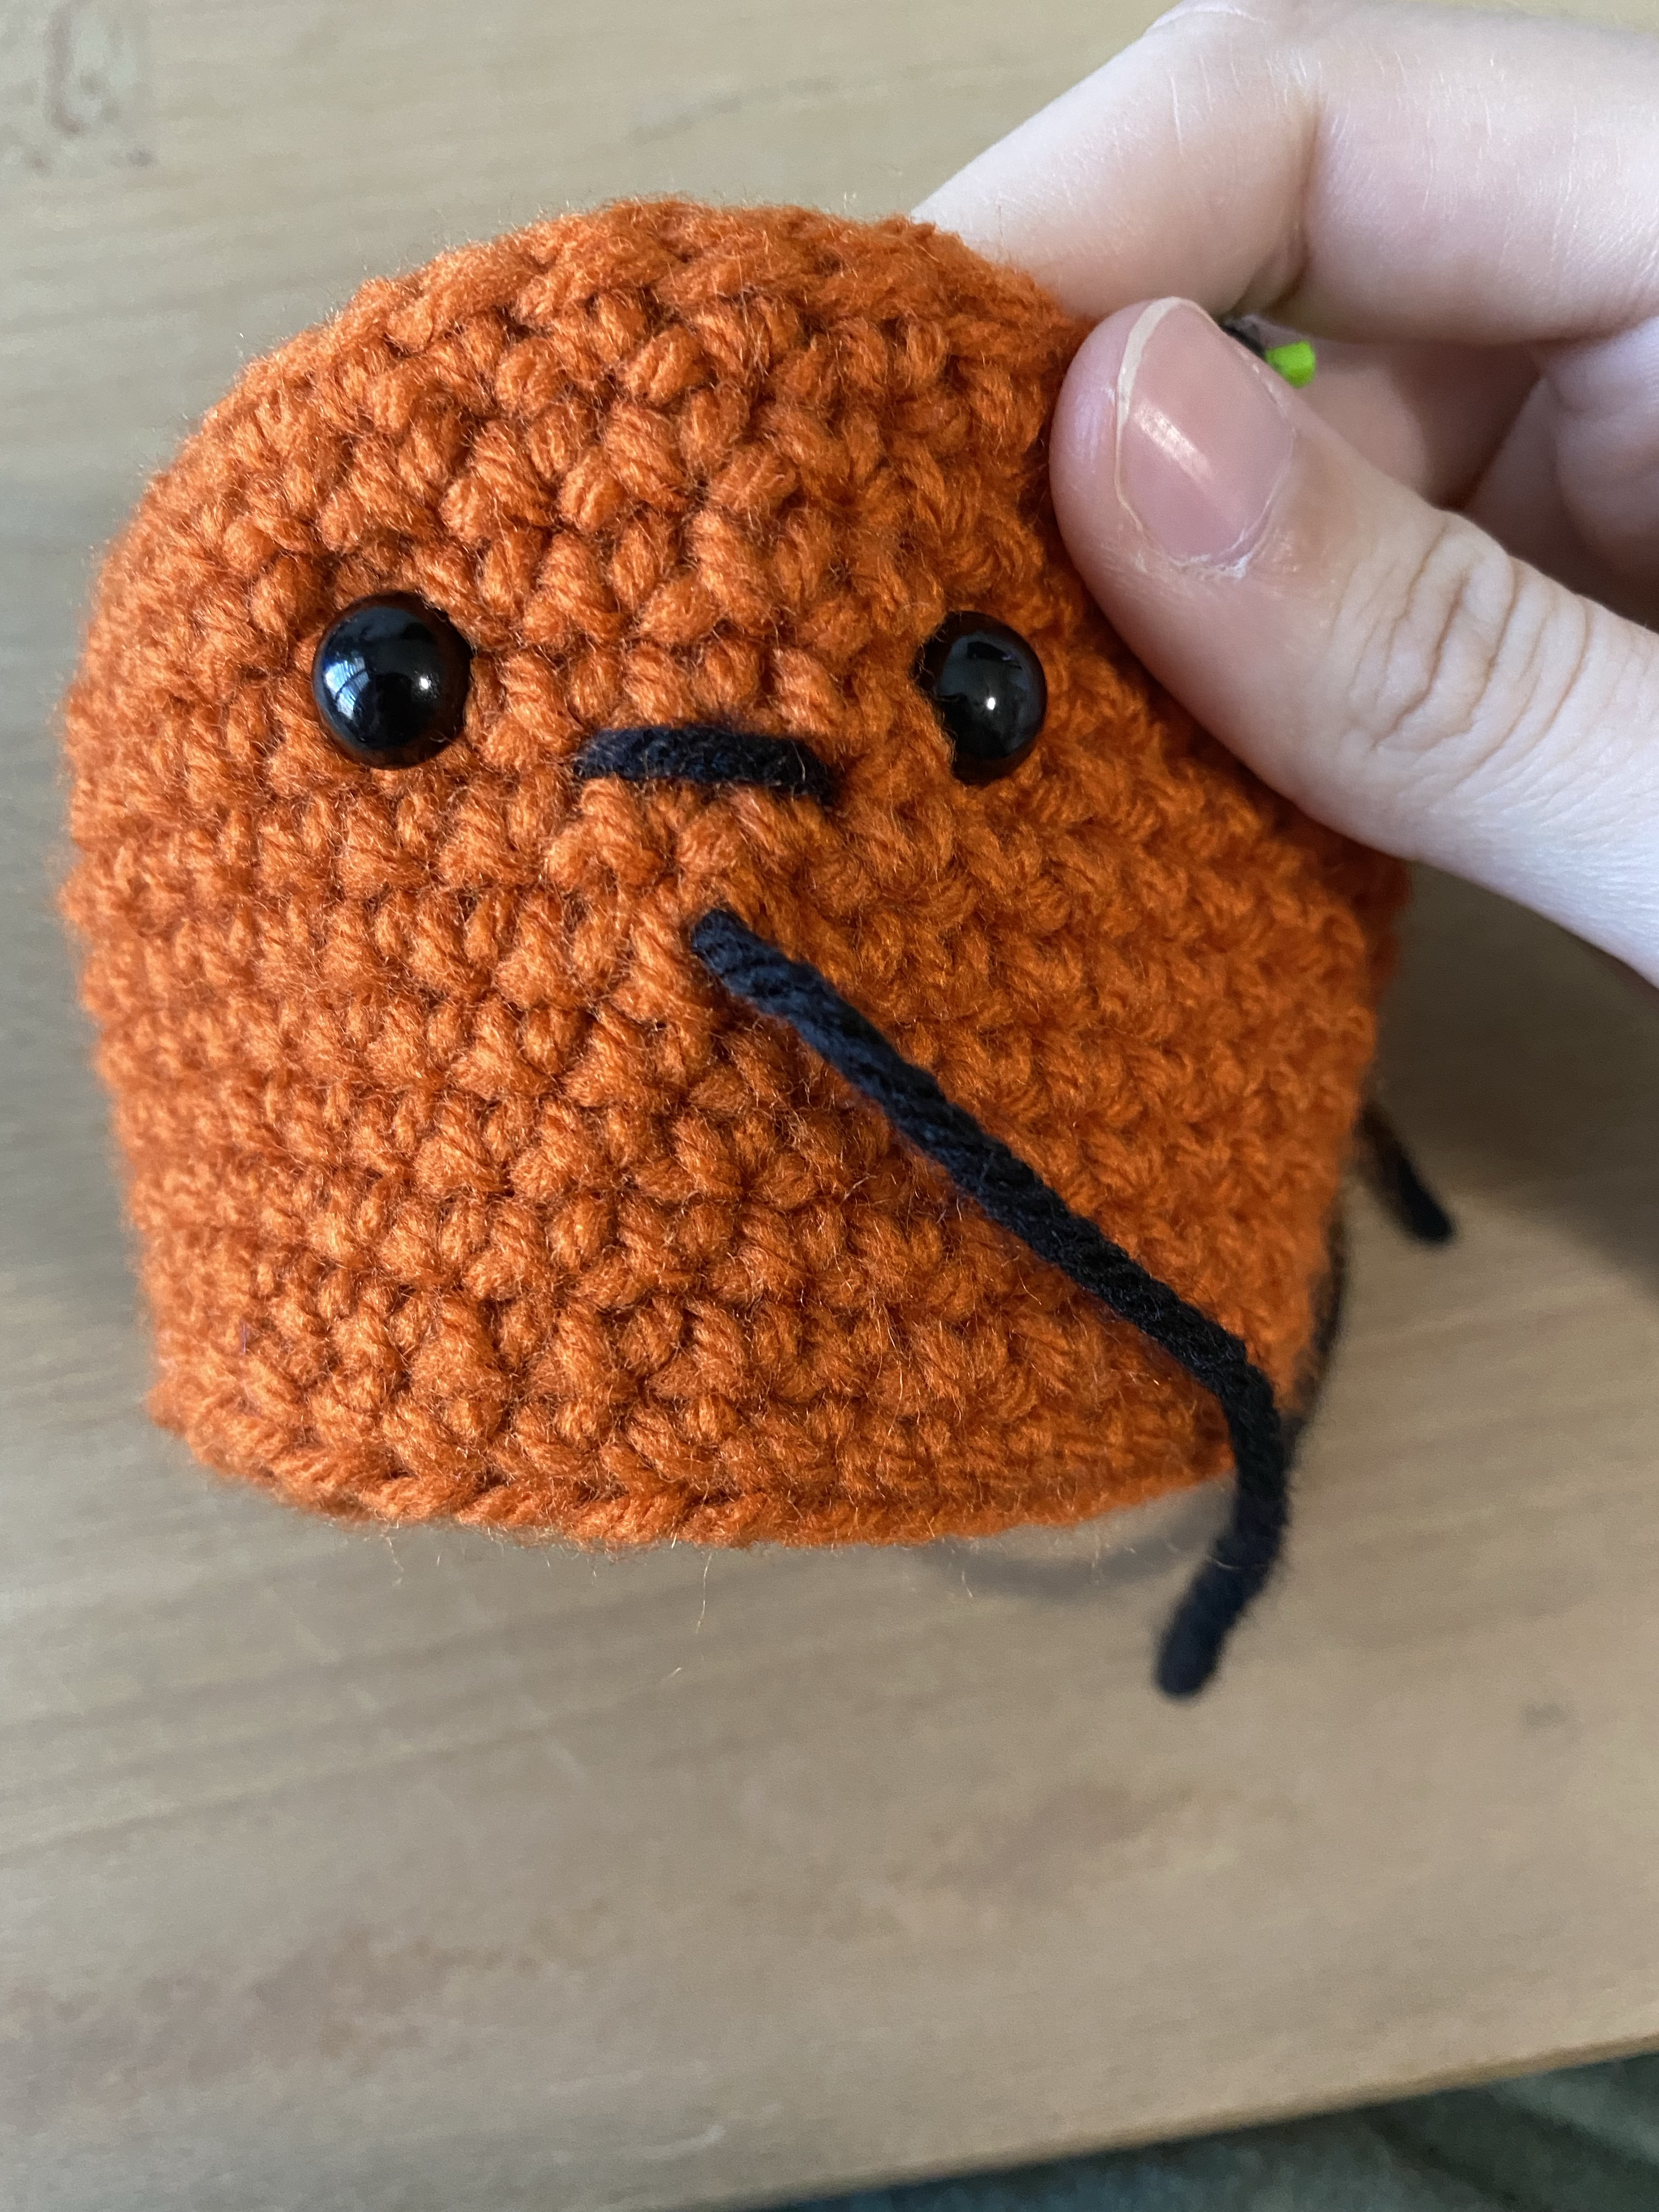
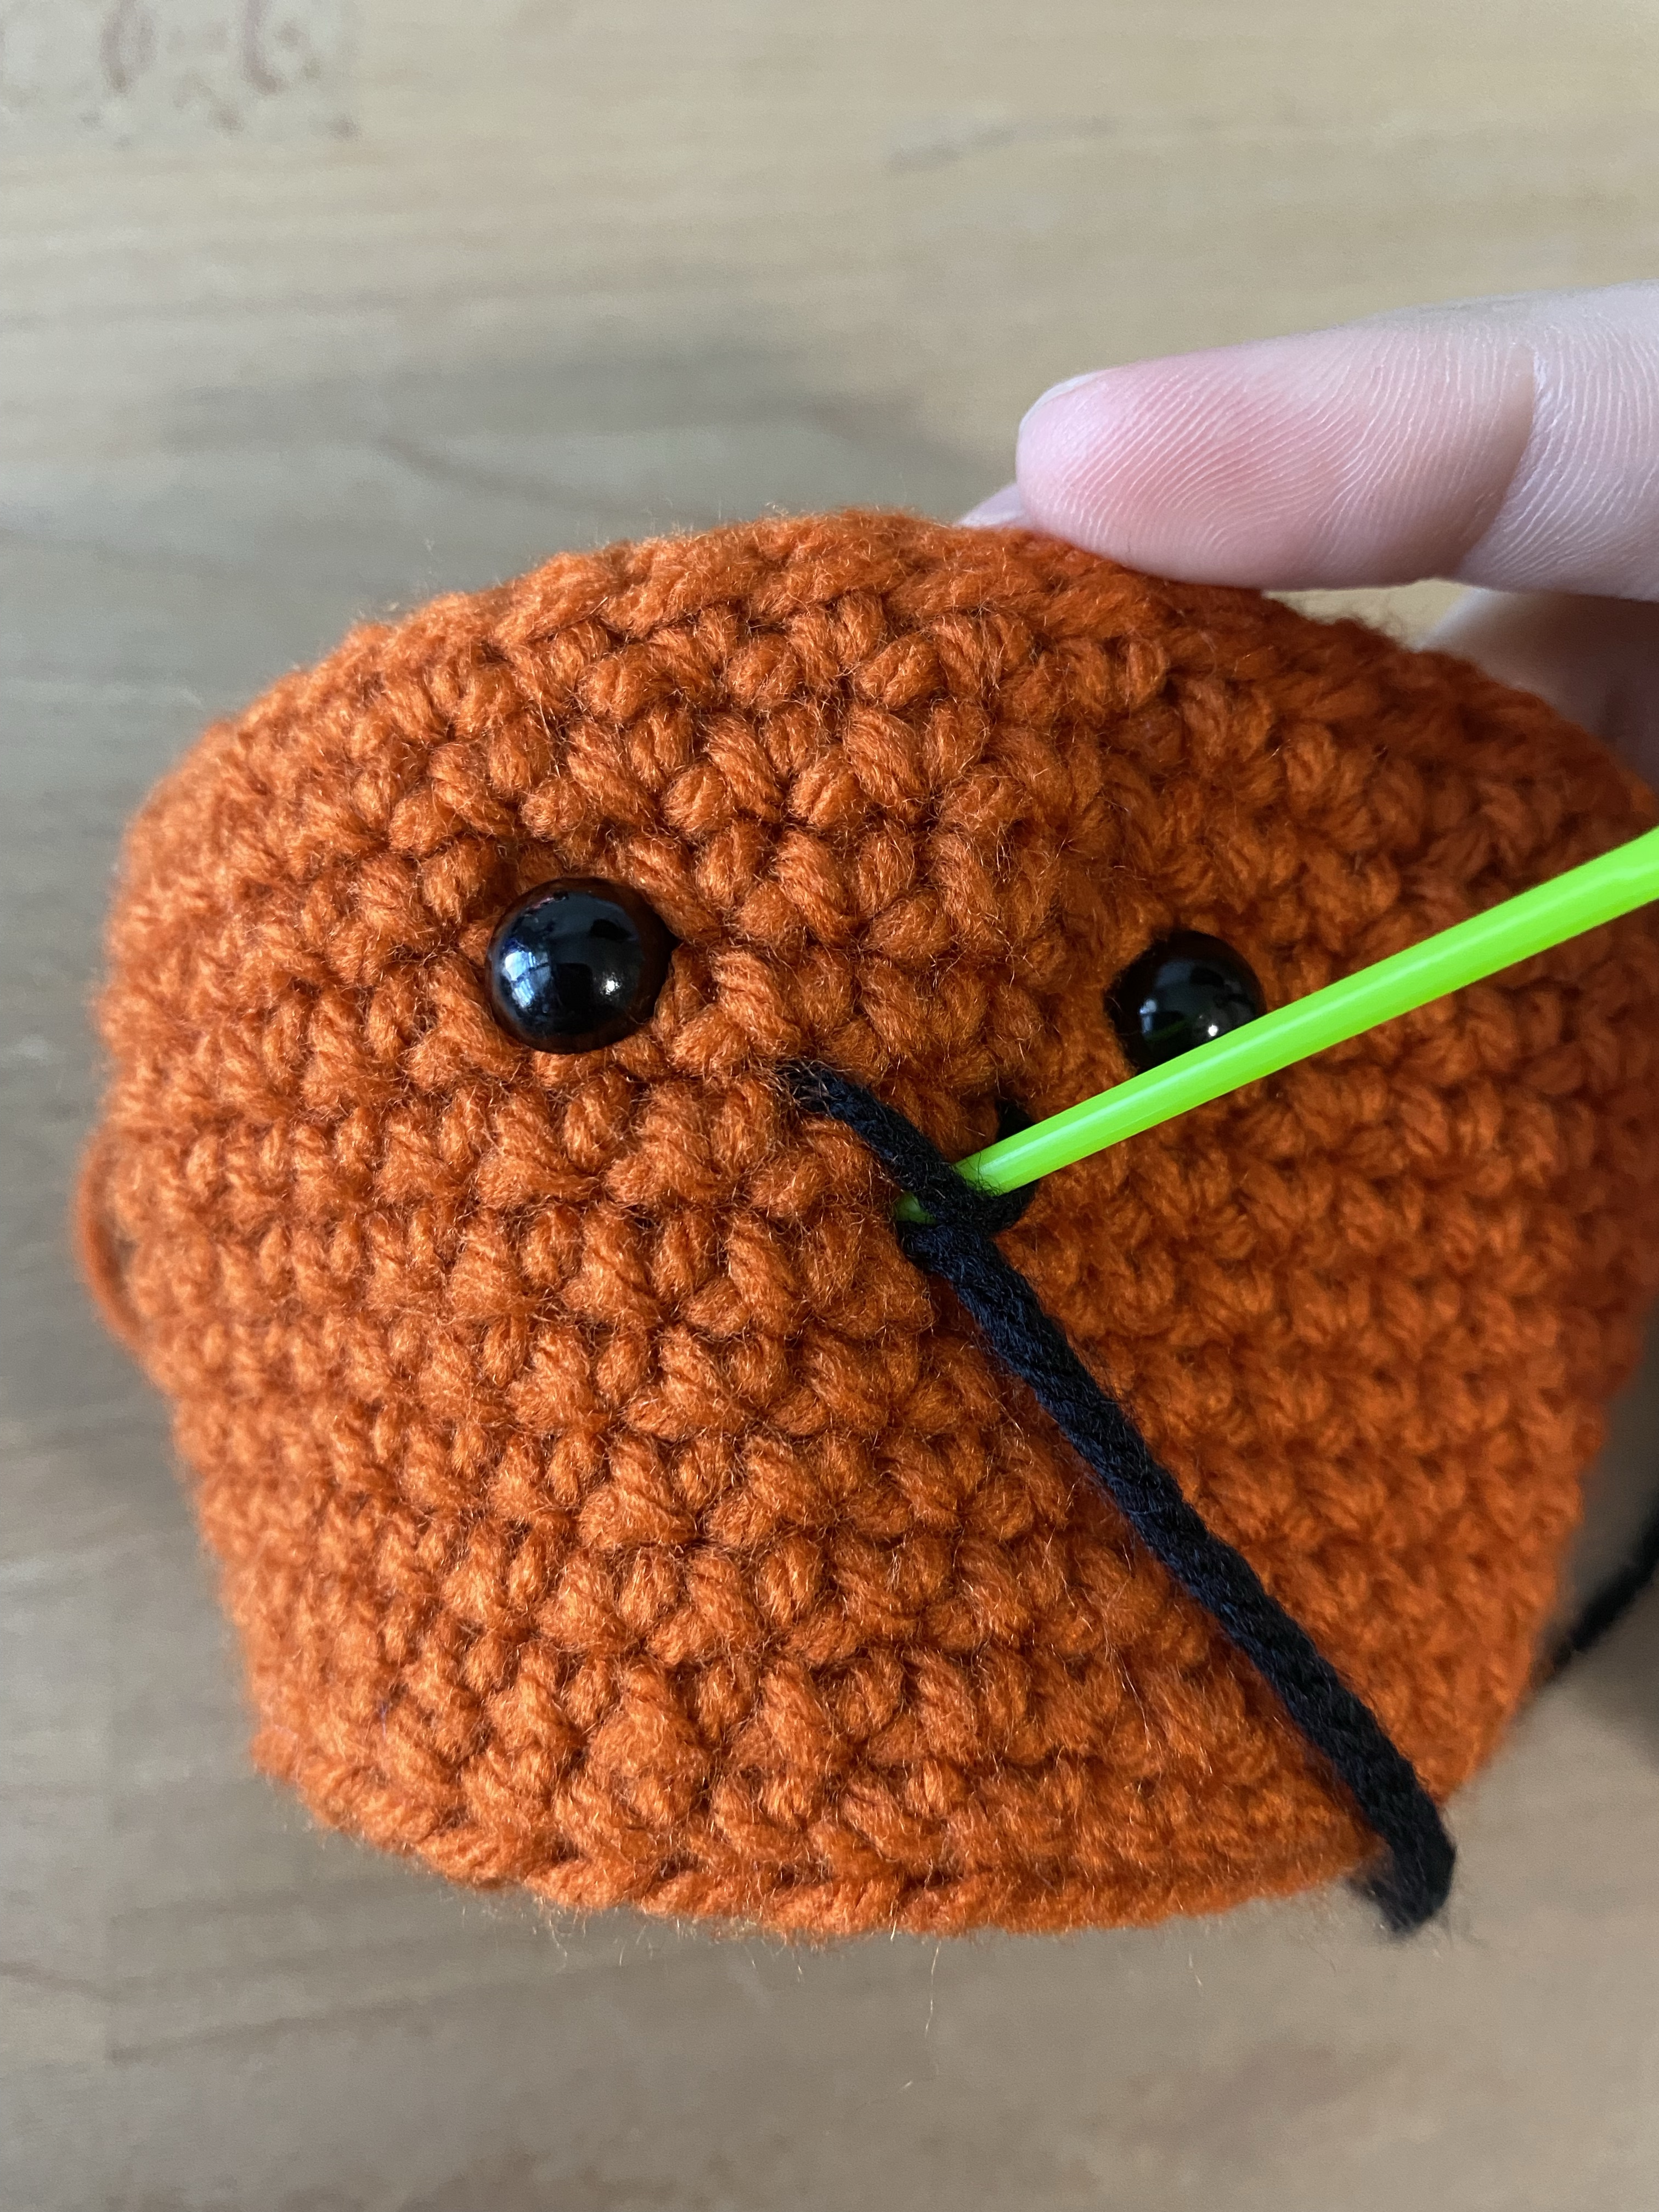
Now that you are in the front, poke through 2-3 stitches over and create a straight line on the front of the piece. From the back, poke through 1-2 stitches lower. This is where the bottom point of your smile will be. Scoop the middle of the straight lines and pull it down. Insert your needle through the same hole at the bottom point of your smile. Pull all the way through to create a V or U shape. The tighter you pull it, the more V shaped, the less you pull it, the more U shaped it will be.
Take your needle off of the yarn and make a square knot on the back. Make sure it’s not too tight – you don’t want to mess up your smile! Trim the yarn if needed to make it easier to sew around later.